Typically, I like to muse about more meaningful topics.
In recent months I’ve been asked a lot for skin care advice, as well as for information about what kind of make up I use and how I apply it. Each time I would type out an email or message with all my tips and tricks, it would take about an hour and soon after someone else would ask. Wash, rinse and repeat…
So, I am going to throw everything here in one place, and just refer all further inquiries to this blog post from now on. First, I will post a picture of me.. yes, it’s a selfie. Yes, I am ashamed that I take them. But, I think it showcases my skin and my make up, and my hair is pulled back in this picture which it rarely is in real life.

Okay, so does my skin look like this when I wake up? No. The goal is to make my skin look flawless, airbrushed and youthful without it looking as if I’ve spent a ton of time, money and make up doing so. I think I’ve perfected my routine at this point where the cost financially is minimal, it only takes me about 15 minutes to apply in the morning, and although there are a large combination of products that are used, it doesn’t look caked on.
First, let’s start from basics. Skin care. If you aren’t taking care of your skin, there is no amount of make up or creams in this world that will hide THAT. I refer to this skin issue as “party girl syndrome”.
Party girl syndrome happens when you are a social butterfly. You are going from work to the bar, stumbling in at 2:30 am and passing out in your stilettos AND your make up because you have to be awake at 8:00 AM for work the next morning. You’re probably consuming alcohol and possibly nicotine. You aren’t getting a lot of sleep, and you certainly aren’t concerned with exfoliation and moisturizing before bed at night.
This causes many issues. Acne from not washing your make up off at night. A dull, dry complexion from excess skin build up and improper circulation to your face because of the lifestyle you’re living. Combined with under eye circles and an overall malnourished look. It’s not cute.
These are the things you MUST do.
1. Wash your face EVERYDAY! Twice a day. First thing in the morning I wash my face, and before bed at night, I wash my face.

2. Exfoliate. I use the Clarisonic which I will take more about later, as well as a face wash with beads in it to scrub all the dead skin cells off my face. It brightens your skin, makes it looks healthier, and makes it feel softer.

3. Change your pillowcase every three to four nights. You don’t have to change your sheets that much (if you don’t want to)
4. Don’t touch your face!!! I know we all want to, and it took me many months to break the habit of resting my chin in my palm, but the oils and dirt from your hand transfer to your face and clog your pores.
5. Steam your face once a week. This could be slipping into the sauna at the gym or just heating up a big bowl of water and putting a towel over your head so the steam stays under. This opens your pores and all the gunk that’s trapped in there can now come out a lot easier. It also brings a nice glow to your skin because of increased blood flow.

Okay, so those are the five things that must be done. Now here is my skin care and make up routine.

First I use a Clairsonic Mia 2. I don’t think it matters which one you use, Adam got me mine for Christmas and it’s teal and it says “I love you” on it, awwww. They come in all sorts of colors, shown above is the pale pink, they have hot pink, white, blue, purple, and so on.
I use it in the morning and at night in the shower. It comes with a little sample of the Clairsonic face wash which I did use one or two times, but I like a little bit of a stronger face wash. In the directions it says you should not use it with exfoliating face wash because the beads in the face wash will get stuck in the head of the Clarisonic. But I did some further research online and if they beads are very small and fine, it’s fine. So I do use an exfoliating face wash with it. In my humble opinion, you cannot exfoliate enough. It makes your face softer, smoother, reduces acne as well as fine lines.
There is something I should warn you about when beginning to use toe Clarisonic, which the products site does state clearly. If you have acne, it will GET WORSE BEFORE IT GETS BETTER.
There are pimples and impurities in your skin besides the ones you can see. Look at your pimples like an iceberg. You can only see 10% of the iceberg, the other 90% is hiding behind the water. With your skin, especially if you have break outs, the biggest problem is hiding underneath.
When you start to use the Clarisonic, it will begin to dredge up all those hidden impurities and clear out pores that have been clogged for months, maybe years. All the pimples that are hiding will come to the surface, but then they will go away and there will be no more secret break outs or hidden clogged pores. It does get better. Not only that, but your skin will look smoother because you have cleared pores instead of dirty ones.
This can be a little pricey initially, but it’s a worthwhile investment. Not like that juicer I bought when I was going on that fast, only to find out that kale tastes just as bad when it’s juiced as it does when it’s not. So Gross.
The Mia 2 can be bought for $99 on line, there is also a Plus model that looks to be about $250. I have not tried it, it looks fancy, maybe one day. For now mine works just fine.
I highly suggest it. I’ll never stop using it. It’s worked wonders for me.
With the Clarisonic, the face wash I use is Neutrogena Oil Free Acne Stress Control Power Clear Scrub. It uses Microclear Technology, which whatever that means, I like.
This has salicylic acid in it. A lot of acne medications have benzoyl peroxide in them, but I am allergic to benzoyl peroxide. Very, very allergic. When I was going through puberty that was what I used and I would wake up with my eyes swollen together and hives all over my face.
A lot of people prefer the benzoyl because it’s more effective and stronger, but I like the salicylic acid because it gets the job done and it’s more gentle, which means your skin won’t get red as it’s healing. Anyone whose ever had an angry pimple knows that the last thing you want is for it to become MORE red. Yuck.
This is okay to use with the Clarisonic because the exfoliating beads are small enough. It smells like cucumber and doesn’t dry your face out even though it’s oil free.

This face wash will run you about $7.99 at Walmart or Target.
After I wash my face I use Aveeno Clear Complexion Moisturizer. This is a little bit more expensive than your Clean and Clear brands, but it is the one facial lotion I found for your face that does not compound the break outs. It does have salicylic acid in it as well, but all the other ingredients are all natural. It has a total soy complex additionally that smoothes out the skin. You can get it at Target for about $13, my sister told me she found at it Walmart for cheaper. I’m sure Amazon sells it for even cheaper if you don’t mind the wait.
The scent is no unpleasant, it smells very clean. It never burns, doesn’t make my skin peel, and makes my face very soft and smooth.

So the wash and moisturize before bed. Go to sleep on a clean pillow case. Repeat in the morning.
When I do have a break out, or one stubborn pimple during highly stressful times, I use Clean and Clear Rapid Clear Acne Spot Eliminating Gel. I put it on the pimple as many times a day as I can. On days off I won’t wear any make up at all and I’ll apply it through out the day probably four or five times.
I like this because it not only takes care of the pimple, but of the spot that sometimes gets left behind by the pimple when it is healing. It reduces redness immediately and usually clears the pimple up within three days after it appears. If I get a little tingle which notifies me a blemish might be getting ready to rear it’s ugly head, I throw that on it and the spot usually never makes an appearance.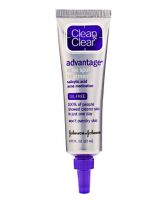
This will run you anywhere from $8 to $10 bucks depending on where you get it and if there is a sale going on.
In the morning I do all that over again, and then I apply my make up which is as follows.
First I put a Primer on. I do it immediately after the moisturizer because it goes on and sets best that way. I never used to apply a primer before my make up, and would notice that half way through the day it would start coming off or I would look shiny. The primer has really put an end to the half way through the day let down.
The one I use is Revlon Photoready Perfecting Primer. 
They have two. The one on the left is a Color Correcting Primer, but I don’t have a lot of uneven skin tones going on. I use the one on the right, and it works miracles. I have used both, they essentially do the same thing, so in a pinch they can be interchangeable.
Here is a picture I dug up on the internet of a girls face, one half without primer, the other half with. This will show you the differences.

As you can clearly see, the side of her face that has the primer is more matte, and you can see less imperfections. That because primers use a reflective pigment which, when light hits it, reflects the light back instead of letting it shine on your skin.
I apply the primer all over, including my eyelids, because whatever make up I put on next will stick better with the primer. Putting it on your eyelids avoids that eye shadow crease you’ll see about an hour after you put the eyeshadow on. It’s not cute.
This primer is not cheap, there are cheaper ones out there and there are more expensive ones out there. The cheaper ones don’t work as well, and the more expensive ones work about the same. So you see the logic here. It’s about $12, I’ve found it at Target for $10 at times.
After the primer, I apply a liquid foundation. I use Maybelline Dream Liquid Mousse Foundation. I have about three bottles all in different shades, and depending on my skin tone I will mix and match to get my skin color right.

I like the mousse because it goes on really smooth and it doesn’t smear or streak. Some people use brushes to put on the concealer. I know I should, but I do not because I don’t use a ton. I put a couple drops on the back of my hand to warm it up, and use the tip of my clean finger to apply dots. One under each eye, two on my forehead, one on each cheek, and then one on my chin. Then I use the tips of two or three of my CLEAN fingers, and blend it all together.
At this point it will look a little dewey, which is fine. But I prefer a more matte, airbrushed look. So on top of this I apply a pressed powder. Clean and Clear Oil Control Clean pressed powder to be exact. This is a compact and it comes with one little circular pad to apply the powder. Clean and Clear also sells three refill pads separately which I also purchase because I switch out the pad every two weeks or so. That keeps it clean and also cuts down on break outs because I am not using the same pad that my face oils have built up on.

The foundation will run you about $9.50, and the pressed powder about $7.00. Walgreens does a special a lot which is buy one Cover Girl Product and get one 50% off, and because I use some other products from Cover Girl I will often take advantage of that.
Next, I apply a little bit of blush. I don’t tan a lot now because it’s Winter and it looks unnatural if I am walking around Rochester NY with a Miami tan. I still don’t want to look like a Walking Dead cast member, so I need a bit of color. The blush I use that I have fallen in love with is Maybelline Master Glaze.

I use the brighter pink one. My skin tone is naturally more pale, so the pink works well. Using this product, you will need a LIGHT hand. A little goes a long way. There is a line between looking alive and looking like a circus clown, and with this blush that line is thin.
I dab a tiny bit right on my cheek bone at the outside corner of my eye and sweep upwards and a little down on the apples of my cheeks.
This blush costs about $8.00, but will last at least three months.
Now on to the eyes, which I believe to be the most important part of any make up routine because that is where people look the most.
I use two eyeshadows. They are both from the Maybelline Color Tattoo Pure Pigments line. They come in cute little jars and you need a brush to put them on with. On my eyelids I use Barely Brazen which is a light cream color. Under my brow I use Breaking Bronze which is more gold tone and highlights your eye brows.

These you can find at Target for $5 each, and they also last quite a while. The brush can be a little more expensive if you find the right one, but if you take care of it, it will also last a while. I use on from Avon, Ulta has many fine brushes, as well.
For my eyeliner, I have a trick of doing a winged look. It makes your lashes look longer, your eyes look bigger, and I think it’s more interesting than just outlining your eyes. It took me a while to perfect the winged look. There are YouTube tutorials to help you, getting the right eyeliner is also crucial.
I use Maybelline Lash Stilleto in Blackest Black. It’s a great dramatic, inky black. Most importantly, the tip on the liner is very thin which makes it easier to create the look I use. 
This eyeliner will cost about $7.00. I have to admit, eyeliner and mascara is what I go through the most of. So the less I mess up my eyes and have to start over, the better on my budget…
Mascara comes next, and I like to use a lot of it. I want my eyes to look dramatic and my eyelashes to be very long and dark. I’ve been using Cover Girl Lash Blast in Very Black for as long as I can remember, probably since it first came out. I’ve been interested in other mascaras, and who knows, I might branch out, but if it’s not broken I usually dont try and fix it.

It’s not too expensive, only about $6.00 everywhere. I like it because it typically doesn’t clump and wears comfortably all day. It never flakes, which is a big problem I’ve had with mascaras in the past and one I cannot tolerate. I also use this mascara for darkening my brows, so it serves a dual purpose.
And there you have it. Everything I do, everything I use, and my routine from A to Z. This has taken many, many years of trial and error but I think I’ve finally gotten to a place that I’m happy with.
I hope this helps anyone, and if you have any other questions concerning skin care, please reach out to me. My husband always tells me I’m the “vainest” person he knows, so I do enjoy talking about all the trivial stuff that goes into getting there.
Remember, your skin will not transform over night. Do not give up, don’t get discouraged, and keep doing the right things and you will get there.


